I know, I know, this topic has been covered a billion times before. Everyone has got their own idea of what the perfect multimedia system is. But hear me out, I think you’ll like what I have to say. Since you’re probably in the process of upgrading to Snow Leopard, perhaps now is a good time to reorganize your media.
When we’re done you will have the following:
- Central iPhoto and iMovie libraries
- Your central iPhoto library accessible in Front Row
- All your music, movies and TV shows, organized and accessible directly from your remote control
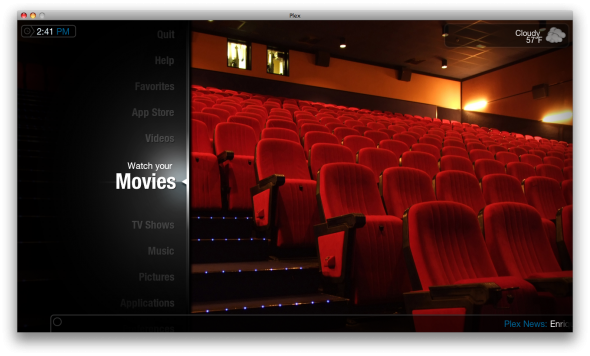
Have all your media accessible with your remote control.
The requirements
Like all solutions, there are some requirements. However, I would consider these requirements pretty basic. For most gadgeteers out there, these are things you already got in your possession:
- A Network Attached Storage (eg. Drobo, ReadyNAS, or an old Linux box). Preferably something with some redundancy (RAID1, RAID5, RAID-Z etc.)
- Two or more Macs with Leopard or later (perhaps a Mac Mini to the TV/Projector and an iMac as a desktop)
- A lot of media (picture, music, movies, TV shows etc).
Sounds too good to be true? Well, it isn’t. Best of all, you won’t have to spend a single dime on software. So what’s the secret? Good ‘ol UNIX symlinks and a software called Plex. That’s it.
Configuring the NAS
Since I have no idea what kind of NAS you’ve got (and it doesn’t really matter), all I’ll say is that I recommend that you create the following shares:
- ‘pictures’ – for the iPhoto library
- ‘videos’ – for the iMovie library
- ‘movies’ – for all your movies
- ‘tvshows’ – for all your TV shows
- ‘music’ – for all your music
If your NAS supports AFP, that’s great, but SMB will do just fine too.
Copying the media to the NAS
While I’m not going to cover how you copy your movies, TV shows and music (as I assume you know that), I will however cover how you copy your iPhoto and iMovie libraries.
Start by connecting to your network shares ‘pictures’ and ‘videos’ (or equivalent). You can do that either by browsing to them in Finder, or use Finder’s ‘Connect to server’ feature (available under ‘Go’ -> ‘Connect to server’).
If you’re a power user, skip the next four paragraphs.
Let’s start with the iPhoto library. Open up your home directory and go into the ‘Pictures’ folder. Now copy the ‘iPhoto Library’ folder over to the share ‘pictures’. Depending on the size of your archive and the speed of your network, this can take a while. Once done, rename the folder ‘iPhoto Library’ on your local computer to ‘iPhoto Library.old’ or something similar.
Now, this is the important part. Go over to the ‘picture’ share on the NAS and drag the iPhoto Library back to the local folder while pressing Command and Option. An arrow will show up under the icon you are dragging. Release the mouse button. If the files start to copy, you did not successfully press Command and Option.
We’re now done with iPhoto. You should now be able to fire up iPhoto and it will access the photos directly from the NAS. To do the same for another computer, all you need to do is to rename the local ‘iPhoto Library’ into something else, and create a link as we just did above.
Next up is the iMovie library (if you use it). Start by opening up the two folders (‘videos’ on the NAS and Movies in your home directory). Now copy the ‘iMovie Projects’ from the local Movies folder onto ‘videos’ on the NAS. Next, rename ‘iMovie Projects’ on the local machine to ‘iMovie Projects.old’ and create a link to the NAS (by dragging it from the ‘videos’ folder to the local ‘Movies’ folder with Command and Option held down). Repeat the same thing with the folder ‘iMovie Events’.
For the power-users out there, there is an easier way to do all this. Simply fire up the Terminal and run the following commands:
$ rsync -aP "~/Pictures/iPhoto Library" /Volumes/pictures/

$ mv "~/Pictures/iPhoto Library" "~/Pictures/iPhoto Library.old"

$ ln -s "/Volumes/pictures/iPhoto Library" ~/Pictures/

$ rsync -aP ~/Movies/iMovie* /Volumes/videos/

$ mv "~/Movies/iMovie Events" "~/Movies/iMovie Events.old"

$ mv "~/Movies/iMovie Projects" "~/Movies/iMovie Projects.old"

$ ln -s "/Volumes/videos/iMovie Events" ~/Movies/

$ ln -s "/Volumes/videos/iMovie Projects" ~/Movies/
For additional computers, just run the same commands, but leave out the rsync.
Automounting the shares
While you would imagine this to be very easy on a UNIX based system, it’s surprisingly difficult on Mac OS. Perhaps there is a better way, but this is the most straight-forward solution I’ve found. If you know of a better way of doing this, please let me know!
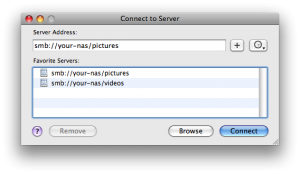
From Finder, navigate to the ‘Go’ menu and select ‘Connect to Server’. Once it opens up, you need to enter the address to your NAS (complete with the names of the share). That is, if you NAS is named FOO, enter ‘smb://foo/pictures’ and press the plus icon. Repeat this for the share ‘videos’.
Next we need to open up the folder ‘Library/Favorites’ in your home directory. Within this folder, you will see the two shares you just created in the step above. Leave this Finder window open while you click on ‘Apple’ -> ‘System Preferences’ -> ‘Accounts.’ Then select ‘Login Items.’ Now drag the two shares from Favorites into the list of Login Items.
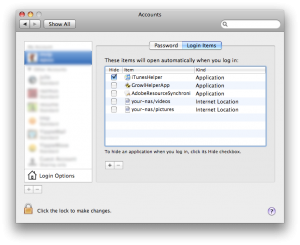
The Items list after dragging in the two shares.
The two shares will now automatically mount upon login for the current user. As noted above, this is not a great way to automatically mount shares, but as far as I know, this is the most convenient way. Keep in mind that, if you do not automatically mount the shares, you will not be able to access your iPhoto/iMovie library until you’ve manually mounted the shares.
Moving on to the other media
With iPhoto and iMovie moved to the central storage, it’s time to move on to the other media. Luckily this is much easier.
The cornerstone in managing all the remaining media is a software called Plex. If you never heard of it, Plex is basically a Mac OS version of the popular media center solution XBMC for Xbox. In its look and feel, Plex is quite similar to Front Row, but it offers a plethora of features that is missing in Front Row. Not only are you able to watch your Movies and TV Shows, you will also be able to install apps within Plex which allow you to stream media directly from sources such as Hulu and BBC.
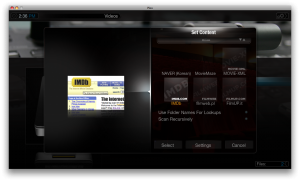 Assuming you’ve already downloaded and installed Plex, just launch it and head to ‘Watch your Videos’ -> ‘Add Source’ -> ‘Browse’ -> ‘Windows Network (SMB)’ -> Locate your NAS and select the share ‘movies’ and press ‘OK.’ Now go to ‘Set Content,’ select ‘Movies,’ ‘imdb,’ and then press ‘Select’. Plex will now scan through the folder and all its sub-folders and run it against imdb to try to figure out what it is. If the movies are properly named, Plex will fetch the description of the movie, the cover as well as the full name and year. It will then take all of that data and present them neatly organized under ‘Watch your Movies’
Now repeat the same thing for ‘tvshows’ and ‘music,’ but select the content accordingly.
The whole process is pretty straight forward, but since the Plex Wiki already does a great job of describing this process in greater detail, I will simply recommend that you read more about that there.
There you go, that’s it really. While there is a whole lot of things that can be added to this article, such as iPhoto integration etc., I’ve intentionally left that out to keep the article a bit briefer. You might also wonder why I didn’t move the iTunes library over to the NAS. The reason for this is that I think that it might get corrupted if multiple users access it simultaneously. That’s why I instead suggested that you simply move the music-files itself to the network, and play them directly in Plex.
One obvious expansion of this setup is to include Plex Media Server. Perhaps I will cover that in a ‘Part 2′
Author: Viktor Petersson Tags: guide,
iLife,
Mac OS X,
media center,
plex




 Assuming you’ve already downloaded and installed Plex, just launch it and head to ‘Watch your Videos’ -> ‘Add Source’ -> ‘Browse’ -> ‘Windows Network (SMB)’ -> Locate your NAS and select the share ‘movies’ and press ‘OK.’ Now go to ‘Set Content,’ select ‘Movies,’ ‘imdb,’ and then press ‘Select’. Plex will now scan through the folder and all its sub-folders and run it against imdb to try to figure out what it is. If the movies are properly named, Plex will fetch the description of the movie, the cover as well as the full name and year. It will then take all of that data and present them neatly organized under ‘Watch your Movies’