It’s a good secure practice to force SSL on the the Admin back-end and the login-page in WordPress. I’m hardly the first one to point this out. There’s even an entire page over at WordPress’ website dedicated to this (Administration over SSL).
I’ve spent the last few days setting up WordPress as a CMS and webshop (with wp-e-commerce) for a company. While there are no credit cards involved in the webshop, I still wanted to secure the login and admin page. However, since the website is hosted at Dreamhost, I was limited to the .htaccess file. Moreover, since the .htaccess-file is the same for both SSL mode and non-SSL mode, I needed to use some kind of condition to avoid creating an infinite loop.
Enough rambling. The code snippets over at ‘Administration over SSL’ didn’t work, so I had to write one myself. Here it is:
RewriteCond %{HTTPS} !=on

RewriteRule ^(wp-admin.*|wp-login.*) https://www.yourdomain.com/$1

RewriteCond %{HTTPS} =on

RewriteRule !^(wp-admin.*|wp-login.*) http://www.yourdomain.com/$1
Also, please note that this snippet must be after WP’s own redirection snippet, otherwise it won’t work. The entire .htaccess file looks as follow:
RewriteEngine On
## WordPress' SEO permlinks
RewriteCond %{REQUEST_FILENAME} !-f
RewriteCond %{REQUEST_FILENAME} !-d
RewriteRule . /index.php [L]
## Beefing up the security
RewriteCond %{HTTPS} !=on
RewriteRule ^(wp-admin.*|wp-login.*) https://www.yourdomain.com/$1
RewriteCond %{HTTPS} =on
RewriteRule !^(wp-admin.*|wp-login.*) http://www.yourdomain.com/$1
Update: This will actually not work very well as images for the back-end are not stored in any of the SSL folders. Hence the the server tries to serve the images without SSL while you are in SSL mode, which does not work very well.
Author: Viktor Petersson Tags: Dreamhost,
security,
WordPress
Today when I logged into Google Docs I discovered that I had a new document. With Google Doc’s collaboration feature, this is nothing shocking. What was weird was the following:
- I don’t know the person who shared the document
- I never received any notification regarding the document
When looking closer I saw something really interesting. The document was shared with ‘Everyone.’ I immediately became curious about this and tried to replicate this myself, which I unfortunately failed.
I have no idea what the person sharing the document did to accomplish this, but it’s a quite serious problem. Somehow I do not think the person sharing the document intended to share it with ‘Everyone.”

A serious Google Docs sharing bug?
After talking to a few other Google Docs users, the document does not appear to be shared with everyone. Please let us know if you see the same document in your Docs too.
Author: Viktor Petersson Tags: Google Docs,
security,
web
That title sure caught your attention, right? It’s not as bad as it sounds. I’m not a Black Hat hacker, I just enjoy reading security related books.
Back in 2003 the famous/notorious hacker Kevin D. Mitnick released his first book called The Art of Deception which discussed different elements of security that relate to social engineering. When I read the book back then I was really both chocked and amazed how easily a well-skilled social engineer can gain access to the most sensitive type of information.
In his latest book The Art of Intrusion, Mr. Mitnick moves on from social engineering to discuss digital security. Since I personally have much more experience with digital security than with social engineering, the techniques used in the stories were not that exciting. 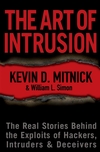 However, the plots of the stories were quite interesting. In a couple of the stories in the book the reader gets to follow security consults who work on penetrating various companies (the company names are not mentioned). Even though the techniques used by these consults were maybe not shocking in any way, the way thought was. The guys in these stories really know how IT-administrators at midsize and large corporation think, and where they’re likely to cut corners and be lazy.
- Did you disable all network ports that are not in use?
– Did you change the default password on all your network-equipped devices?
– Is your internal voice-mail system using the default password?
– Did you install the latest patches on all you servers? Even the internal ones?
– Did you disable all services that are not in use?
Even though the book brings little new technical knowledge to a tech-savvy person, it shows you how a skilled hacker can obtain important information about your system with, what you think is, trivial information.
Verdict: I would recommend this book to anyone who works with technology or security in a corporate environment. Also, if you haven’t read The Art of Deception, I’d also recommend you to read it.
Author: Viktor Petersson Tags: internet,
security
This article is going to teach you how to get out the big guns against information theft on your Apple OS X machine. ‘But,’ you say, ‘I don’t have secrets and besides no-one cares about my stuff.’ Think again! If you are a normal computer user it doesn’t take long before you have plenty of very interesting information on your laptop, digitized and ready to be stolen in seconds.
My secret politically sensitive picture – out in the open and ready to be stolen.
- Your website passwords
- Those handy digital bank statements
- Your accounting information
- That picture from the office when you were really drunk
- Your other girlfriend’s or boyfriend’s phone number
Then think about how quickly someone can make a complete copy of all that data: it can take seconds or minutes. And what’s worse, once the cat is out of the bag, it’s likely you won’t manage to get it back in because it will be plastered over half of internet and stored in a database before you know it. We live in the beginning of the information age and information theft is real, fast, and internet enabled.
If you use Safari, most of your passwords are already protected within your Apple Keychain. This guide is about how to protect the rest of your stuff using encrypted disk images. An encrypted disk image is basically a protected folder which you can store on your computer. If you haven’t heard of it yet, encryption is a method to warp data so it can’t be recognized without doing the same process again backwards. In OS X 10.4, this encryption is not toy encryption either. The standard used, AES-128, is the encryption used for ‘SECRET’ level classified information of the American government.
It is all rather simple; just keep in mind that these tips have been written for OS X Tiger (version 10.4) and that things might be a bit different if you have a different version of OS X.
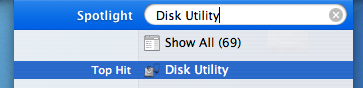
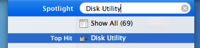 Open up Disk Utility. Normally I’d just spotlight ‘Disk Utility’ – like in the picture on the right – but if you need to find it the old fashioned way, look in Applications/Utilities.
- Click the ‘New Image’ button in the upper left part of the main window, or go to File>New>Blank Disk Image in the menus.
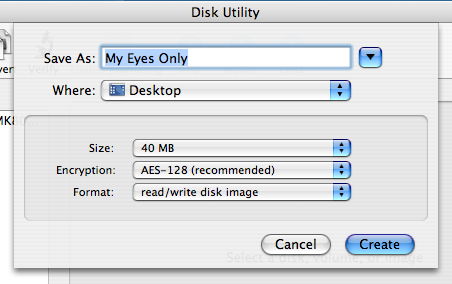
- Type in a nice name for your new disk image. I’m going to call mine ‘My Eyes Only’. I’m also going to make it 40MB big by selecting that from the size drop down.
- Set Encryption to ‘AES-128′. Don’t forget to do this or you’re not protecting your data at all!

- Click create. You will be asked for a password. Make sure you enter something that you won’t forget, because else your data will be gone forever. No-one will be able to get your data out if the password is lost.
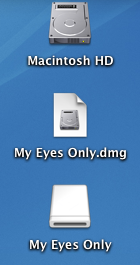 Your image will be created. You can close Disk Utility once it’s done. Now, you will have an image file ‘My Eyes Only.dmg’, which if you double click and enter your password, will open up as an extra ‘drive’ on your desktop. Disk Utility will open it for you automatically the first time.
- Once you are done putting files into your encrypted drive, you will need to eject it.
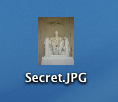
That’s all. Everything you put into your encrypted drive, ‘My Eyes Only’ in this example, will be encrypted with industry standard encryption. Without your password (which you made really sure to memorize and keep safe) it would take thousands of years for a modern day computer to unscramble your data. I’m just going to go ahead and move my Secret.JPG file into My Eyes Only. Here it is in the safety of 128 bit encryption: 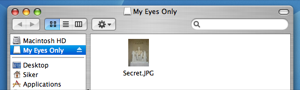
Once I eject this disk the data will be safe and I can rest assured that my picture is a little bit more safe from prying eyes.
Author: Alexander Ljungberg Tags: guide,
Mac OS X,
security