

I was reading Lifehacker’s blog about resizr this morning. Turns out that if you have a Mac, there is a much easier and faster way. No need for big bloated software, just the Automator and Preview. This is how you do it:
- Put your image on your Desktop. Or wherever you can find it. In our example here, the picture is called ‘Picture 1.png’.
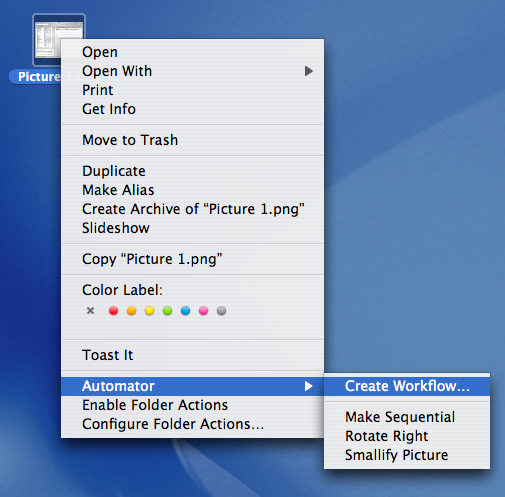
- Right click the image. Go to ‘Automator’ and select ‘Create Workflow…’. (In the screenshot I have some previously created Workflows you might not have. That’s okay.)

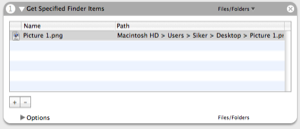 This will bring up the Automator screen. Sweet. On the right hand side in the Automator you will see your picture preselected in an ‘Action’ called ‘Get Specified Finder Items.’ This tells Automator to load the picture you right clicked on in the second step.
- Now go into the Library on the left side and select ‘Preview’ as your Application. Preview has an action called ‘Scale Images’. Just what we need! So double click that action to add it. Automator will ask you if you want to add an action to make a copy of the picture before resizing it, so that you can keep your original. If you want to do this, click ‘Add’, but make sure you are not trying to copy the image from the Desktop to the Desktop. For some reason this doesn’t work.
 You will find the ‘Scale Images’ Action in your list of actions now. Go ahead and set the desired size you want. I’m setting it to 480 pixels, meaning the image will be 480 pixels wide once the Automation has run.
- Click the big ‘Run’ button and you’re done! Preview will automatically load your picture, optionally make a copy of it, and then scale it to the size you wanted.
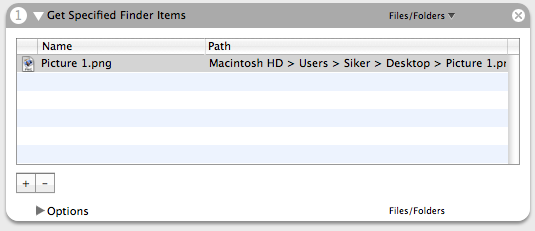

Not bad for a couple of clicks, huh? Now the cool thing with the Automator is that you can save this Automation. Then you can access it by just right clicking an image and selecting your image scaling action from the Automator drop down. Before you save your Automation, make sure to change the first action in the list to ‘Get Selected Finder Items’. Otherwise your Automation will try to resize the same picture every time you run it. Your final Automation should look like this:
 Note that in this version your original picture needs to be in a different folder than the Desktop or the copy action will fail, as I mentioned in 4.
Happy resizing!
You can download the final action as an archive here: ScaleTo480px.zip.
Author: Alexander Ljungberg Tags: guide, Mac OS X
 Blink This
 Plug This
This post has been removed by a blog administrator.
Apple script is the most powerful tool for mac users, but most of users are not fimilar with it, such as myself.
I am learning it right now…as matter as the fact, its not as hard as you could imagine
The downside is the resultant resized images are not compressed enough and are still way too large (in file size) than they would be had I resized them with an external application.
I use Resize! to batch resize AND compress images. Apple seems to have forgotten the compression side of things.
Still, I use Automator regularly for other stuff and it really is a cool way to get dross things done.
:)
Thanks a lot for your great tutorial. I was having a problem getting Automator to resize images because all the other tutorials failed to mention the file being resized had to be in a folder other than the Desktop!